3 - API를 이용하여 Flutter에서 ChatGPT 구현하기(코드 포함)
2 - Flutter에서 ChatGPT API 사용하기 (2편) 1 - Flutter에서 ChatGPT API 사용하기 (1편) 이번 프로젝트를 하기 위해서는 ChatGPT의 API를 사용해야 한다. API가 뭔가요? API란 자신이 만든 서비스의 기능을 다른
jschan0911.tistory.com
이전까지는 OpenAI API를 이용하여 사용자로부터 입력받은 단어에 대한 8살 아이에게 설명하는 수준의 답변을 얻어냈다.
이번에는 단순 설명 뿐 아니라 입력받은 단어에 대한 사진도 함께 띄워주는 기능을 추가할 것이다.
이를 위해서 무료 라이센스 이미지를 제공하는 'Pixabay'의 API를 이용해보려 한다.
Pixabay 가입하기
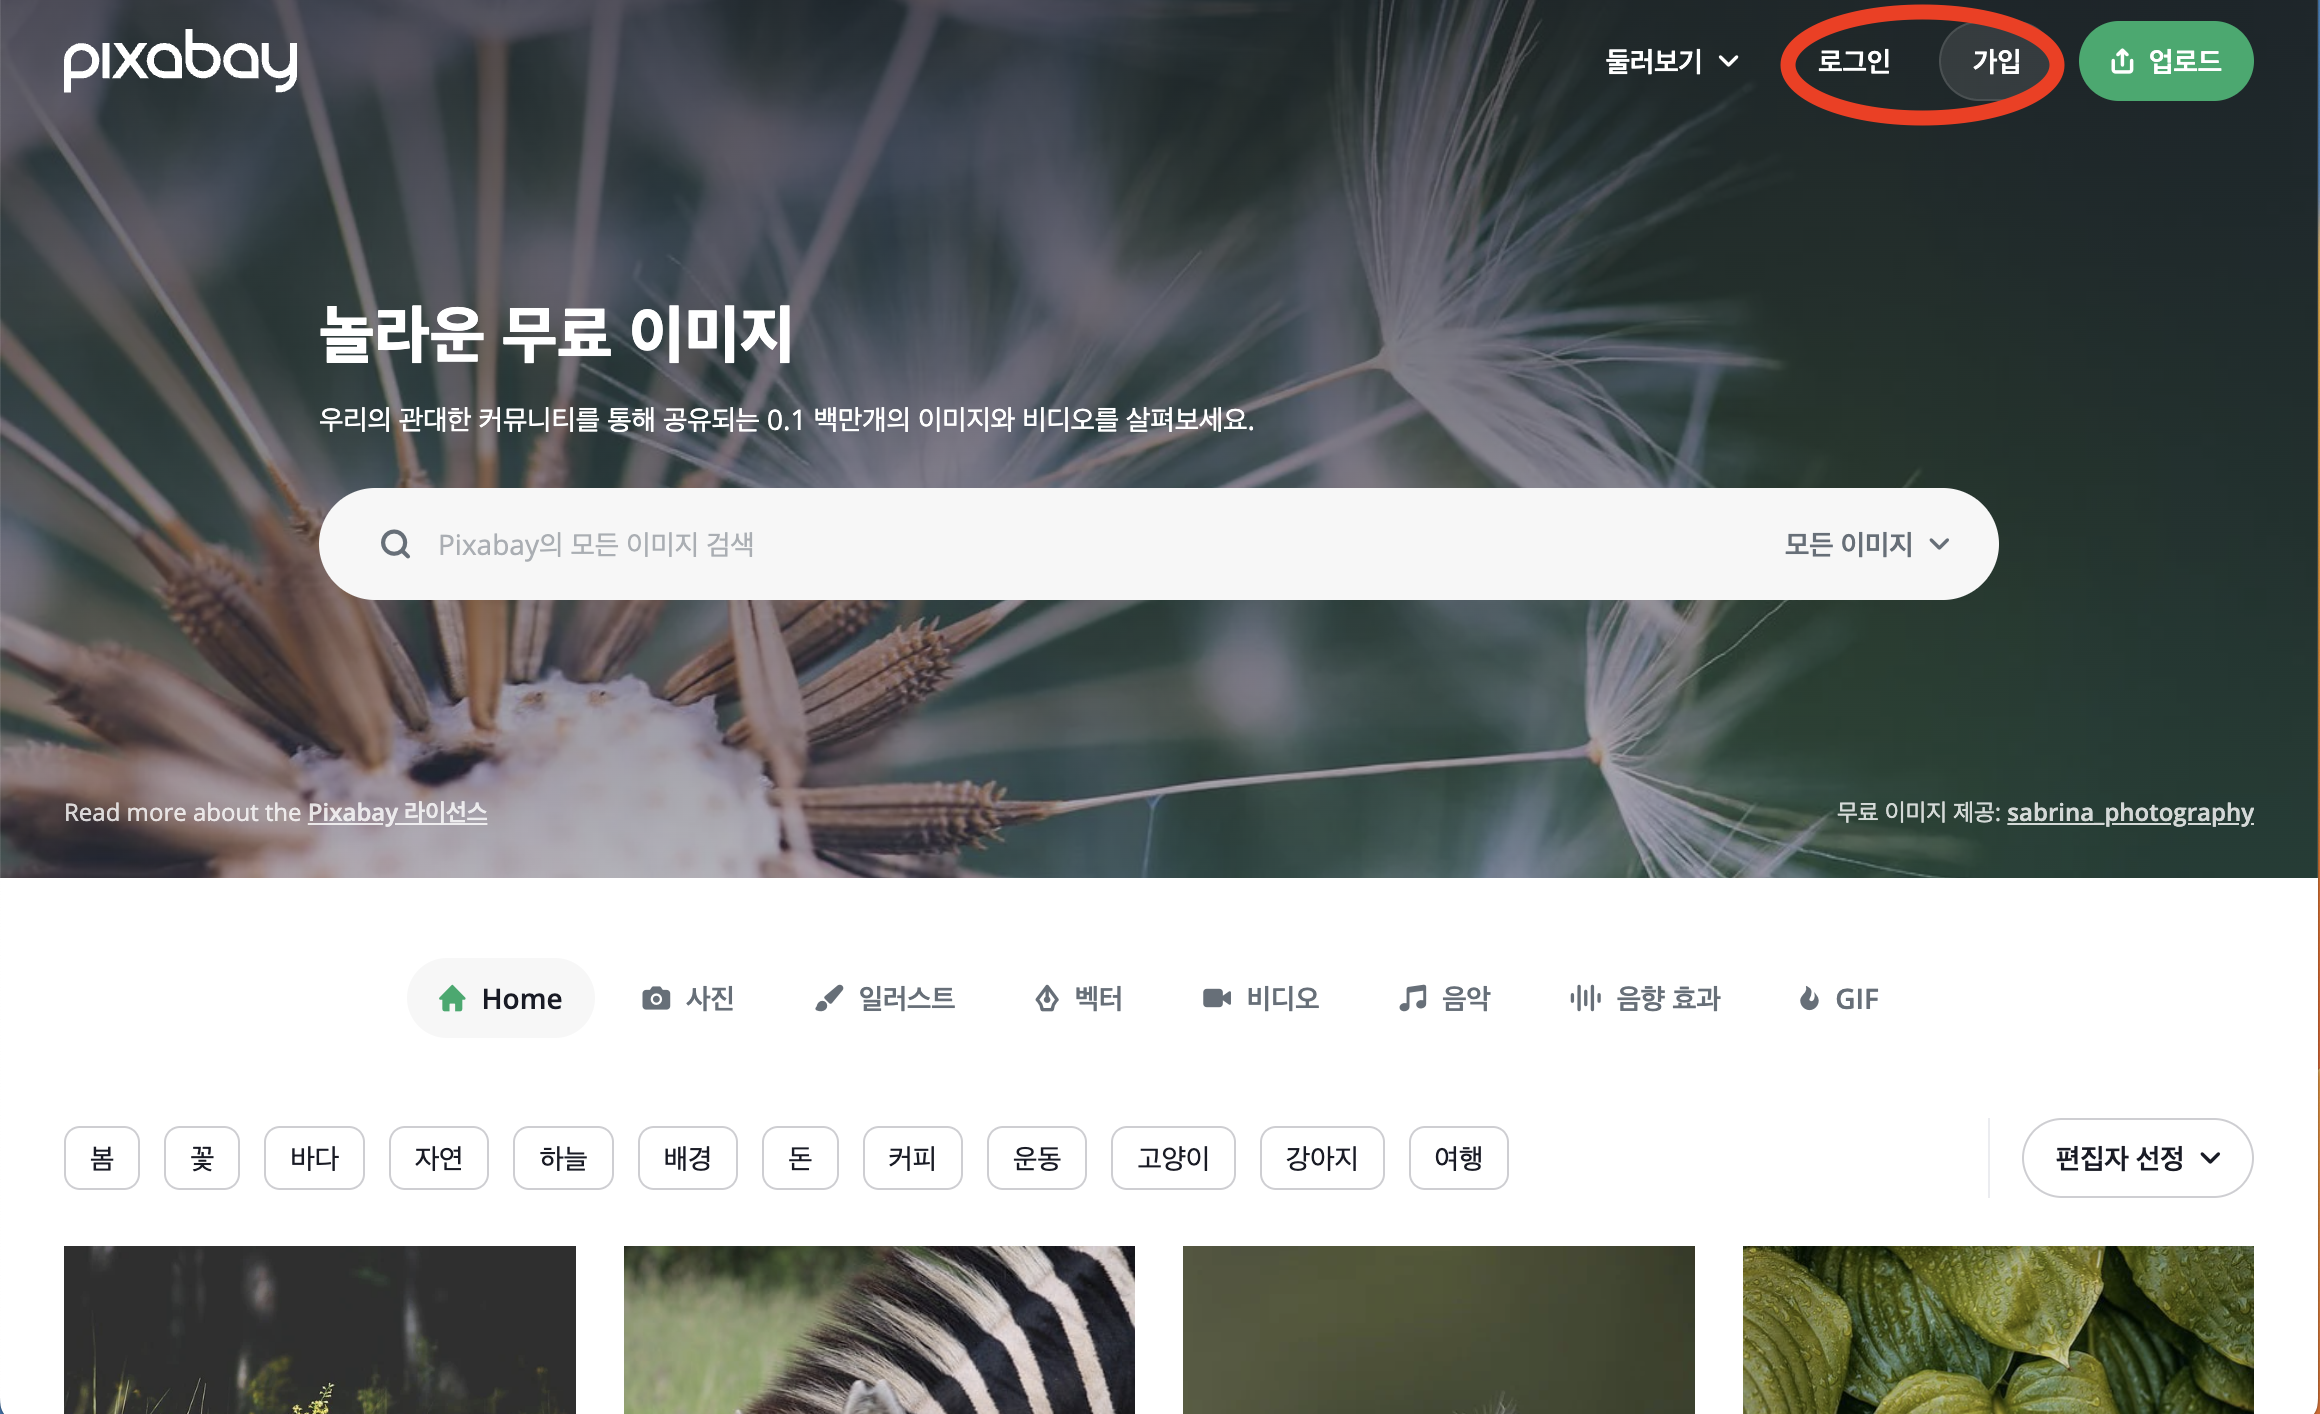
먼저 https://pixabay.com/ko/ 에 접속하여 회원가입 혹은 로그인한다.
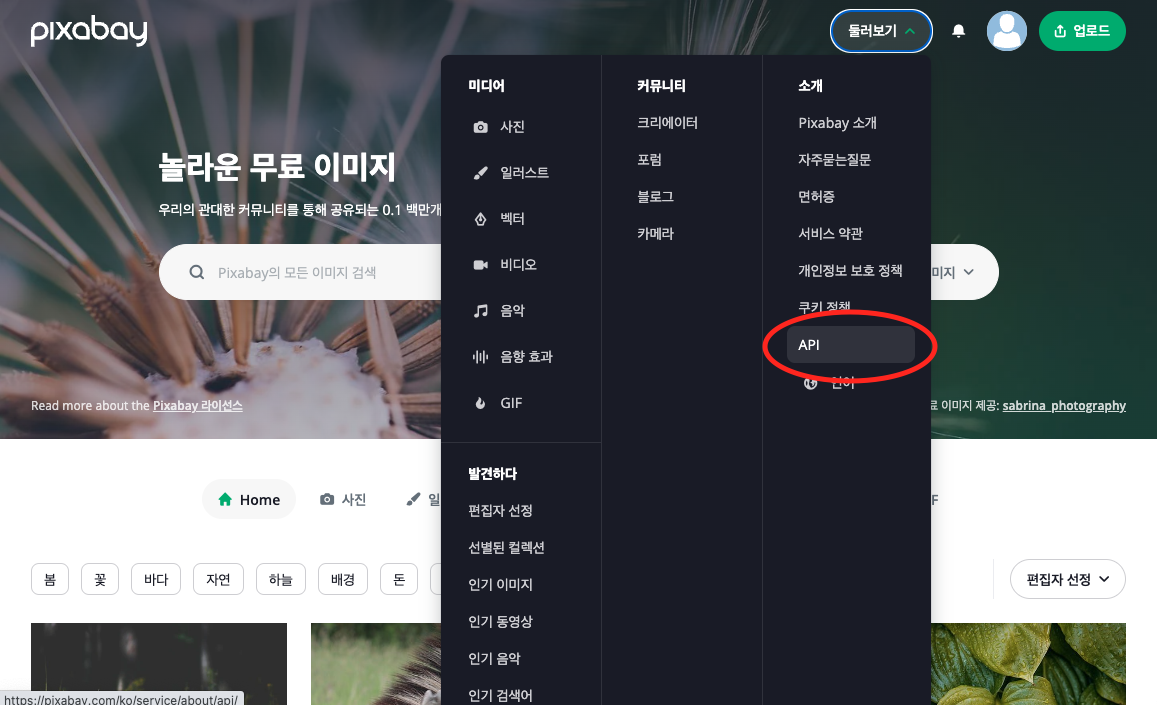
그리고 둘러보기 -> API 를 차례로 클릭한다.

다음에 나오는 페이지에서 Get Started 를 클릭한다.
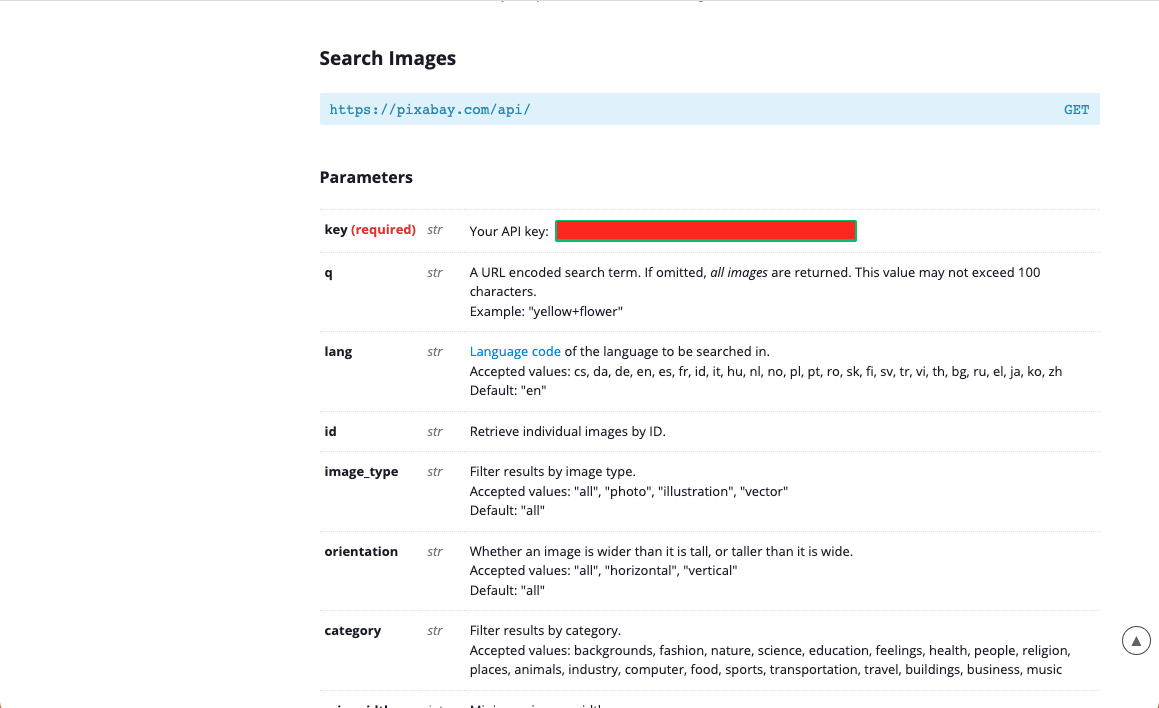
이후 이동된 페이지의 스크롤을 내리다 보면 이미지 검색 API의 설명이 나와있다. 이중 API Key는 본인만 알 수 있도록 관리하자.
Flutter에 적용하기
const pixapayUrl = 'https://pixabay.com/api/?key=$pixabayApiKey';
const pixabayApiKey = '발급 받은 API key';

Future<String> getImgUrl(String prompt) async {
  final response = await http.get(
      Uri.parse('$pixapayUrl&q=$prompt&image_type=photo')
  );

  return json.decode(response.body)['hits'][0]['webformatURL'];
}
Flutter 프로젝트에서 이미지를 띄워주기 위해 필요한 정보를 얻는 함수이다. 이 함수를 통해서는 이미지를 바로 받아오지는 않고 Pixabay 데이터베이스에 업로드된 이미지의 주소를 받아온다.
이를 이미지로 보여주기 위해서는 추가적인 작업이 필요하다.
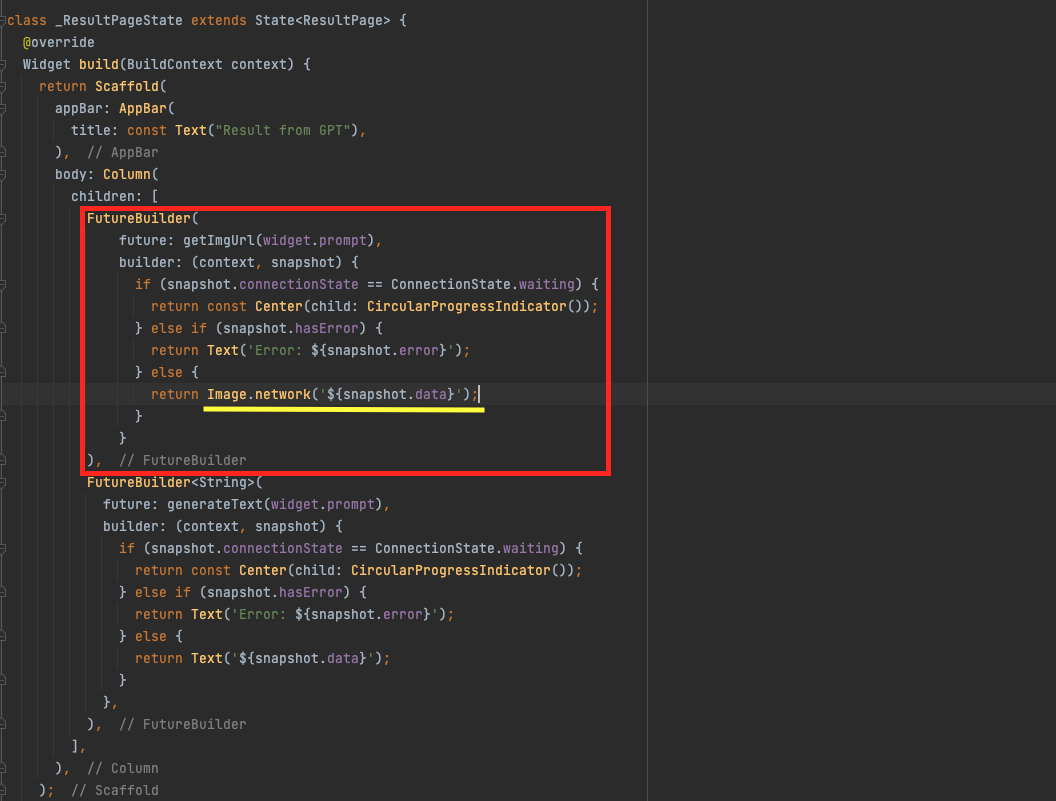
이전에 만든 ResultPage 위젯의 State클래스 부분이다. 붉은색 네모 안 코드가 새롭게 추가된 코드이다.
FutureBuilder 위젯을 통해 데이터를 처리하는 것이 이전에 GPT로부터 받은 응답을 처리하는 과정과 거의 흡사하다.
한 가지 다른 점이 있다면, 노란색 밑줄 부분에 Image.network()를 리턴한다는 점이다.
이 과정을 통해 단순 텍스트 정보였던 Image Url을 이미지로 반환할 수 있게 된다.
//_ResultPageState 클래스 부분

class _ResultPageState extends State<ResultPage> {
  @override
  Widget build(BuildContext context) {
    return Scaffold(
      appBar: AppBar(
        title: const Text("Result from GPT"),
      ),
      body: Column(
        children: [
          FutureBuilder(
              future: getImgUrl(widget.prompt),
              builder: (context, snapshot) {
                if (snapshot.connectionState == ConnectionState.waiting) {
                  return const Center(child: CircularProgressIndicator());
                } else if (snapshot.hasError) {
                  return Text('Error: ${snapshot.error}');
                } else {
                  return Image.network('${snapshot.data}');
                }
              }
          ),
          FutureBuilder<String>(
            future: generateText(widget.prompt),
            builder: (context, snapshot) {
              if (snapshot.connectionState == ConnectionState.waiting) {
                return const Center(child: CircularProgressIndicator());
              } else if (snapshot.hasError) {
                return Text('Error: ${snapshot.error}');
              } else {
                return Text('${snapshot.data}');
              }
            },
          ),
        ],
      ),
    );
  }
}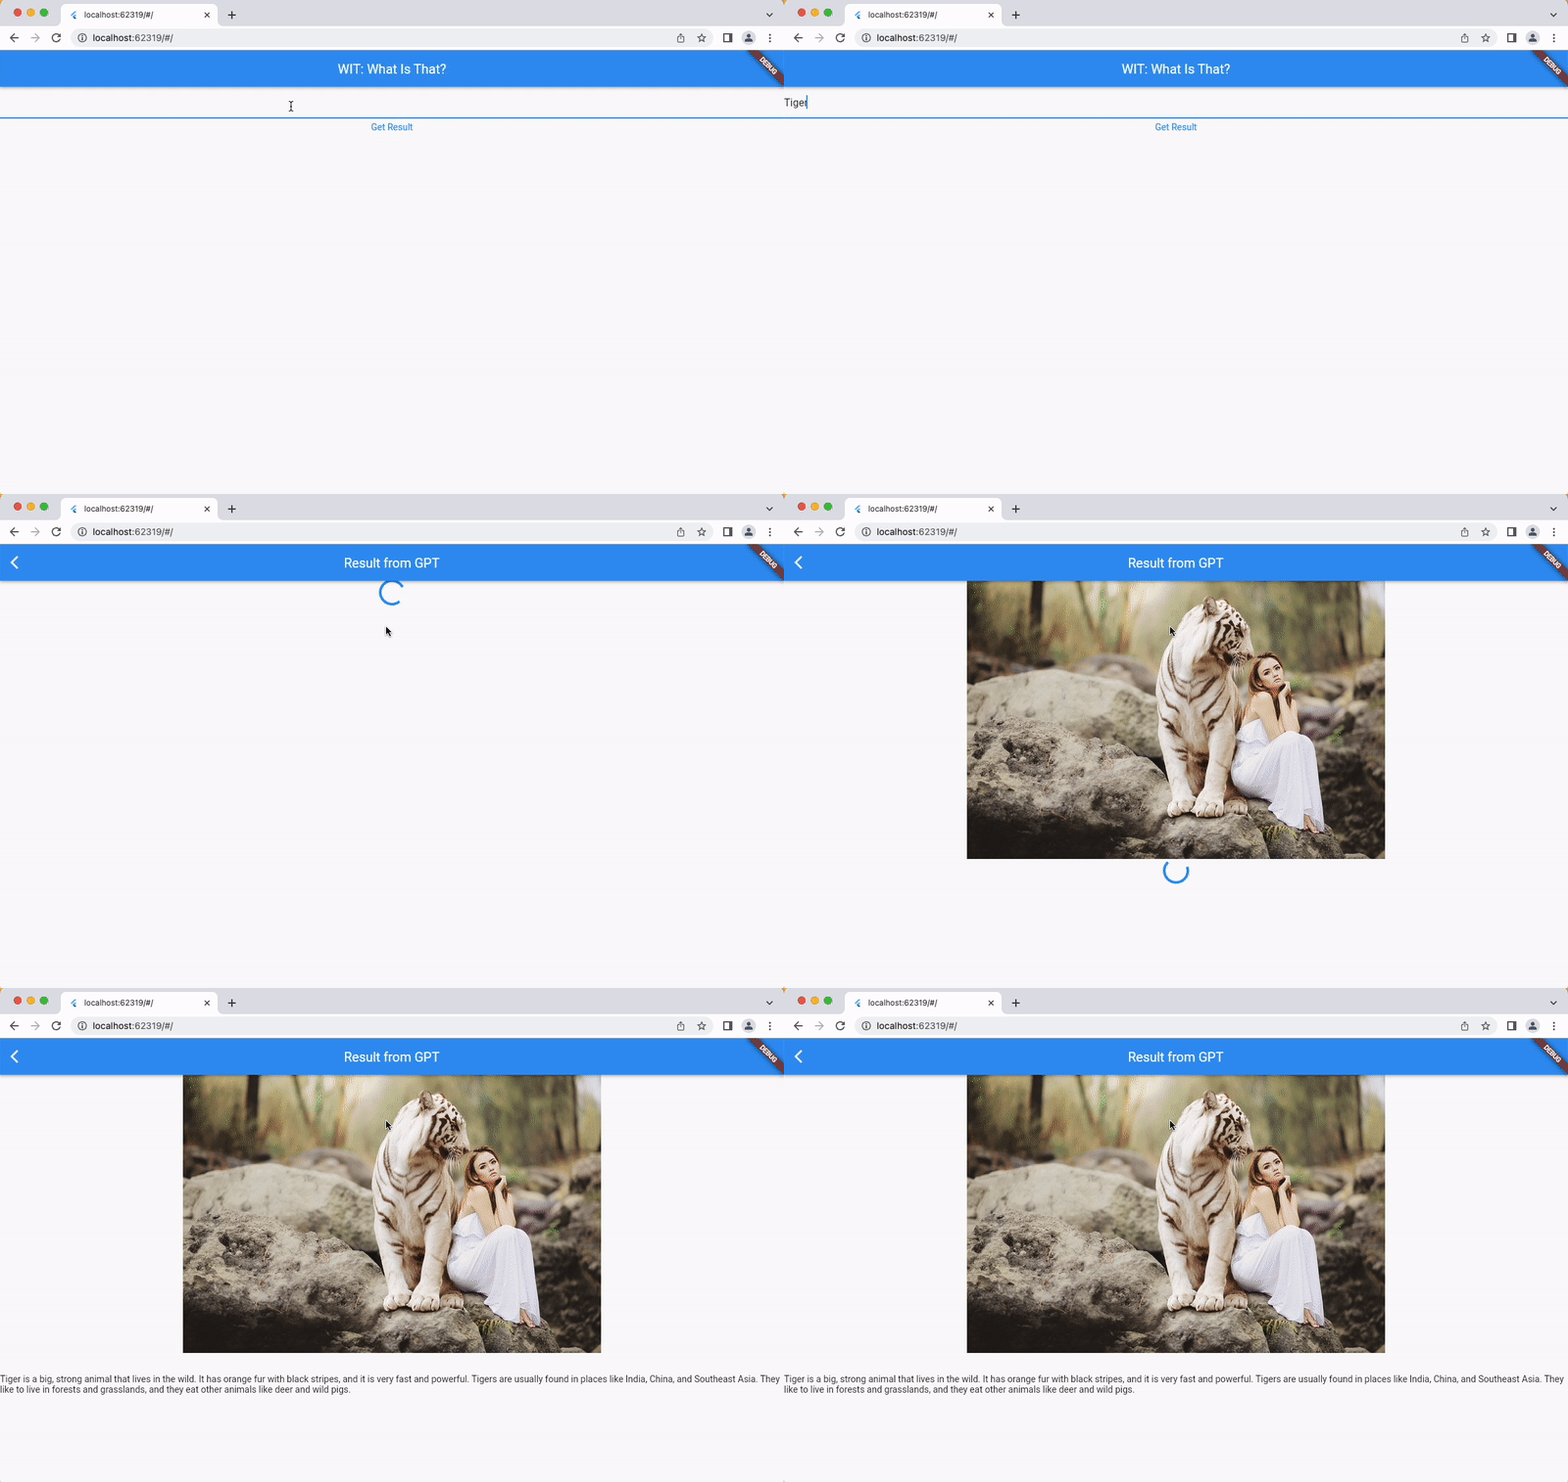
위 페이지를 살펴보면 이미지와 텍스트가 로딩되는 시간이 각기 달라 따로 따로 보여지는 것을 볼 수 있다.
이것이 크게 문제가 되는 것은 아니지만 나의 기준에는 조금 거슬리기에 이미지와 텍스트 정보를 한번에 불러와 띄워보도록 하겠다.

이전까지 만들어진 페이지를 살펴보면 이미지가 생성되는 시간보다 텍스트를 생성하는 시간이 더 긴 것을 볼 수 있다.
따라서 텍스트를 먼저 생성하고 보관해뒀다가 이미지 생성을 명령한다. 두 정보 모두 생성이 완료되었으면 Column 위젯으로 묶어서 한 번에 리턴하므로 두 정보가 한 번에 로딩되는 것처럼 보이게 했다.
//_ResultPageState 클래스 부분

class _ResultPageState extends State<ResultPage> {
  @override
  Widget build(BuildContext context) {
    return Scaffold(
      appBar: AppBar(
        title: const Text("Result from GPT"),
      ),
      body: FutureBuilder<String>(
        future: generateText(widget.prompt),
        builder: (context, snapshot) {
          if (snapshot.connectionState == ConnectionState.waiting) {
            return const Center(child: CircularProgressIndicator());
          } else if (snapshot.hasError) {
            return Text('Error: ${snapshot.error}');
          } else {
            return Column(
              children: [
                FutureBuilder(
                    future: getImgUrl(widget.prompt),
                    builder: (context, snapshot) {
                      if (snapshot.connectionState == ConnectionState.waiting) {
                        return const Center(child: CircularProgressIndicator());
                      } else if (snapshot.hasError) {
                        return Text('Error: ${snapshot.error}');
                      } else {
                        return Image.network('${snapshot.data}');
                      }
                    }
                ),
                Text('${snapshot.data}')
              ],
            );
          }
        },
      ),
    );
  }
}
현재까지 완성된 코드
import 'dart:convert';
import 'package:flutter/material.dart';
import 'package:http/http.dart' as http;

void main() {
  runApp(const MyApp());
}

class MyApp extends StatelessWidget {
  const MyApp({Key? key}) : super(key: key);

  @override
  Widget build(BuildContext context) {
    return const MaterialApp(
      home: FirstPage(),
    );
  }
}

class FirstPage extends StatefulWidget {
  const FirstPage({Key? key}) : super(key: key);

  @override
  State<FirstPage> createState() => _FirstPageState();
}

class _FirstPageState extends State<FirstPage> {
  final TextEditingController _controller = TextEditingController();

  @override
  Widget build(BuildContext context) {
    return Scaffold(
      appBar: AppBar(
        title: const Text("WIT: What Is That?"),
      ),
      body: Column(
        children: [
          TextField(
            controller: _controller,
          ),
          TextButton(onPressed: () {
            String prompt = _controller.text;
            Navigator.of(context).push(MaterialPageRoute(
                builder: (context) => ResultPage(prompt))
            );
          },
              child: const Text("Get Result")
          )
        ],
      ),
    );
  }
}

class ResultPage extends StatefulWidget {
  final String prompt;
  const ResultPage(this.prompt, {super.key});

  @override
  State<ResultPage> createState() => _ResultPageState();
}

class _ResultPageState extends State<ResultPage> {
  @override
  Widget build(BuildContext context) {
    return Scaffold(
      appBar: AppBar(
        title: const Text("Result from GPT"),
      ),
      body: FutureBuilder<String>(
        future: generateText(widget.prompt),
        builder: (context, snapshot) {
          if (snapshot.connectionState == ConnectionState.waiting) {
            return const Center(child: CircularProgressIndicator());
          } else if (snapshot.hasError) {
            return Text('Error: ${snapshot.error}');
          } else {
            return Column(
              children: [
                FutureBuilder(
                    future: getImgUrl(widget.prompt),
                    builder: (context, snapshot) {
                      if (snapshot.connectionState == ConnectionState.waiting) {
                        return const Center(child: CircularProgressIndicator());
                      } else if (snapshot.hasError) {
                        return Text('Error: ${snapshot.error}');
                      } else {
                        return Image.network('${snapshot.data}');
                      }
                    }
                ),
                Text('${snapshot.data}')
              ],
            );
          }
        },
      ),
    );
  }
}
const apiKey = '발급 받은 OpenAI API key';
const apiUrl = 'https://api.openai.com/v1/completions';

Future<String> generateText(String prompt) async {
  final response = await http.post(
    Uri.parse(apiUrl),
    headers: {'Content-Type': 'application/json','Authorization': 'Bearer $apiKey'},
    body: jsonEncode({
      "model": "text-davinci-003",
      'prompt': "What is $prompt? Tell me like you're explaining to an eight-year-old.",
      'max_tokens': 1000,
      'temperature': 0,
      'top_p': 1,
      'frequency_penalty': 0,
      'presence_penalty': 0
    }),
  );

  Map<String, dynamic> newresponse = jsonDecode(utf8.decode(response.bodyBytes));

  return newresponse['choices'][0]['text'];
}

const pixabayApiKey = '발급 받은 Pixabay API key';
const pixapayUrl = 'https://pixabay.com/api/?key=$pixabayApiKey';

Future<String> getImgUrl(String prompt) async {
  final response = await http.get(
      Uri.parse('$pixapayUrl&q=$prompt&image_type=photo')
  );

  return json.decode(response.body)['hits'][0]['webformatURL'];
}
이로써 단어를 입력 받아 8살 아이에게 설명하는 수준의 답과, 단어에 대한 이미지를 한 번에 띄워주는 작업까지 완료했다.
다음 시간에는 뼈대만 있는 현재 프로젝트에 어느정도 디자인 작업을 해볼 예정이다.
'프로젝트 > WIT: What is That? - 쉬운 사전' 카테고리의 다른 글
| 5 - Flutter에서 TextField 꾸미기 (밑줄, 커서 없애기) (0) | 2023.05.16 |
|---|---|
| 3 - API를 이용하여 Flutter에서 ChatGPT 구현하기(코드 포함) (3) | 2023.03.02 |
| 2 - Flutter에서 ChatGPT API 사용하기 (2편) (3) | 2023.02.28 |
| 1 - Flutter에서 ChatGPT API 사용하기 (1편) (0) | 2023.02.28 |
| 0 - 개발 의도 (0) | 2023.02.27 |