2 - Flutter에서 ChatGPT API 사용하기 (2편)
1 - Flutter에서 ChatGPT API 사용하기 (1편) 이번 프로젝트를 하기 위해서는 ChatGPT의 API를 사용해야 한다. API가 뭔가요? API란 자신이 만든 서비스의 기능을 다른 사람이 만들 서비스에게도 제공할 수
jschan0911.tistory.com
이전 과정을 프롬프트 창이 아닌
웹 페이지 내 페이지에서 구현해볼 것이다.
그러려면 질문을 입력 받는 페이지와
질문에 대한 답변을 보여주는 페이지
총 2페이지가 필요하다.

class MyApp extends StatelessWidget {
  const MyApp({Key? key}) : super(key: key);

  @override
  Widget build(BuildContext context) {
    return const MaterialApp(
      home: FirstPage(),
    );
  }
}
이 작업들을 수행하기에 앞서
앞서 flutter 프로젝트 생성 시 자동으로 만들어진
main.dart파일 내 MyApp부분을 모두 지우고,
위 코드를 입력한다.
질문 입력 받는 페이지 만들기

질문 입력 받는 FirstPage의 핵심은
사용자로부터 데이터를 입력 받고,
추후 GPT에게 데이터를 넘겨주는 것이다.
그러려면 TextEditController가 필요하다.
이 컨트롤러를 생성함으로 인해
TextField를 통해 입력받을 내용은
_controller를 통해 제어할 수 있게 된다.
class FirstPage extends StatefulWidget {
  const FirstPage({Key? key}) : super(key: key);

  @override
  State<FirstPage> createState() => _FirstPageState();
}

class _FirstPageState extends State<FirstPage> {
  final TextEditingController _controller = TextEditingController();

  @override
  Widget build(BuildContext context) {
    return Scaffold(
      appBar: AppBar(
        title: const Text("WIT: What Is That?"),
      ),
      body: Column(
        children: [
          TextField(
            controller: _controller,
          ),
        ],
      ),
    );
  }
}
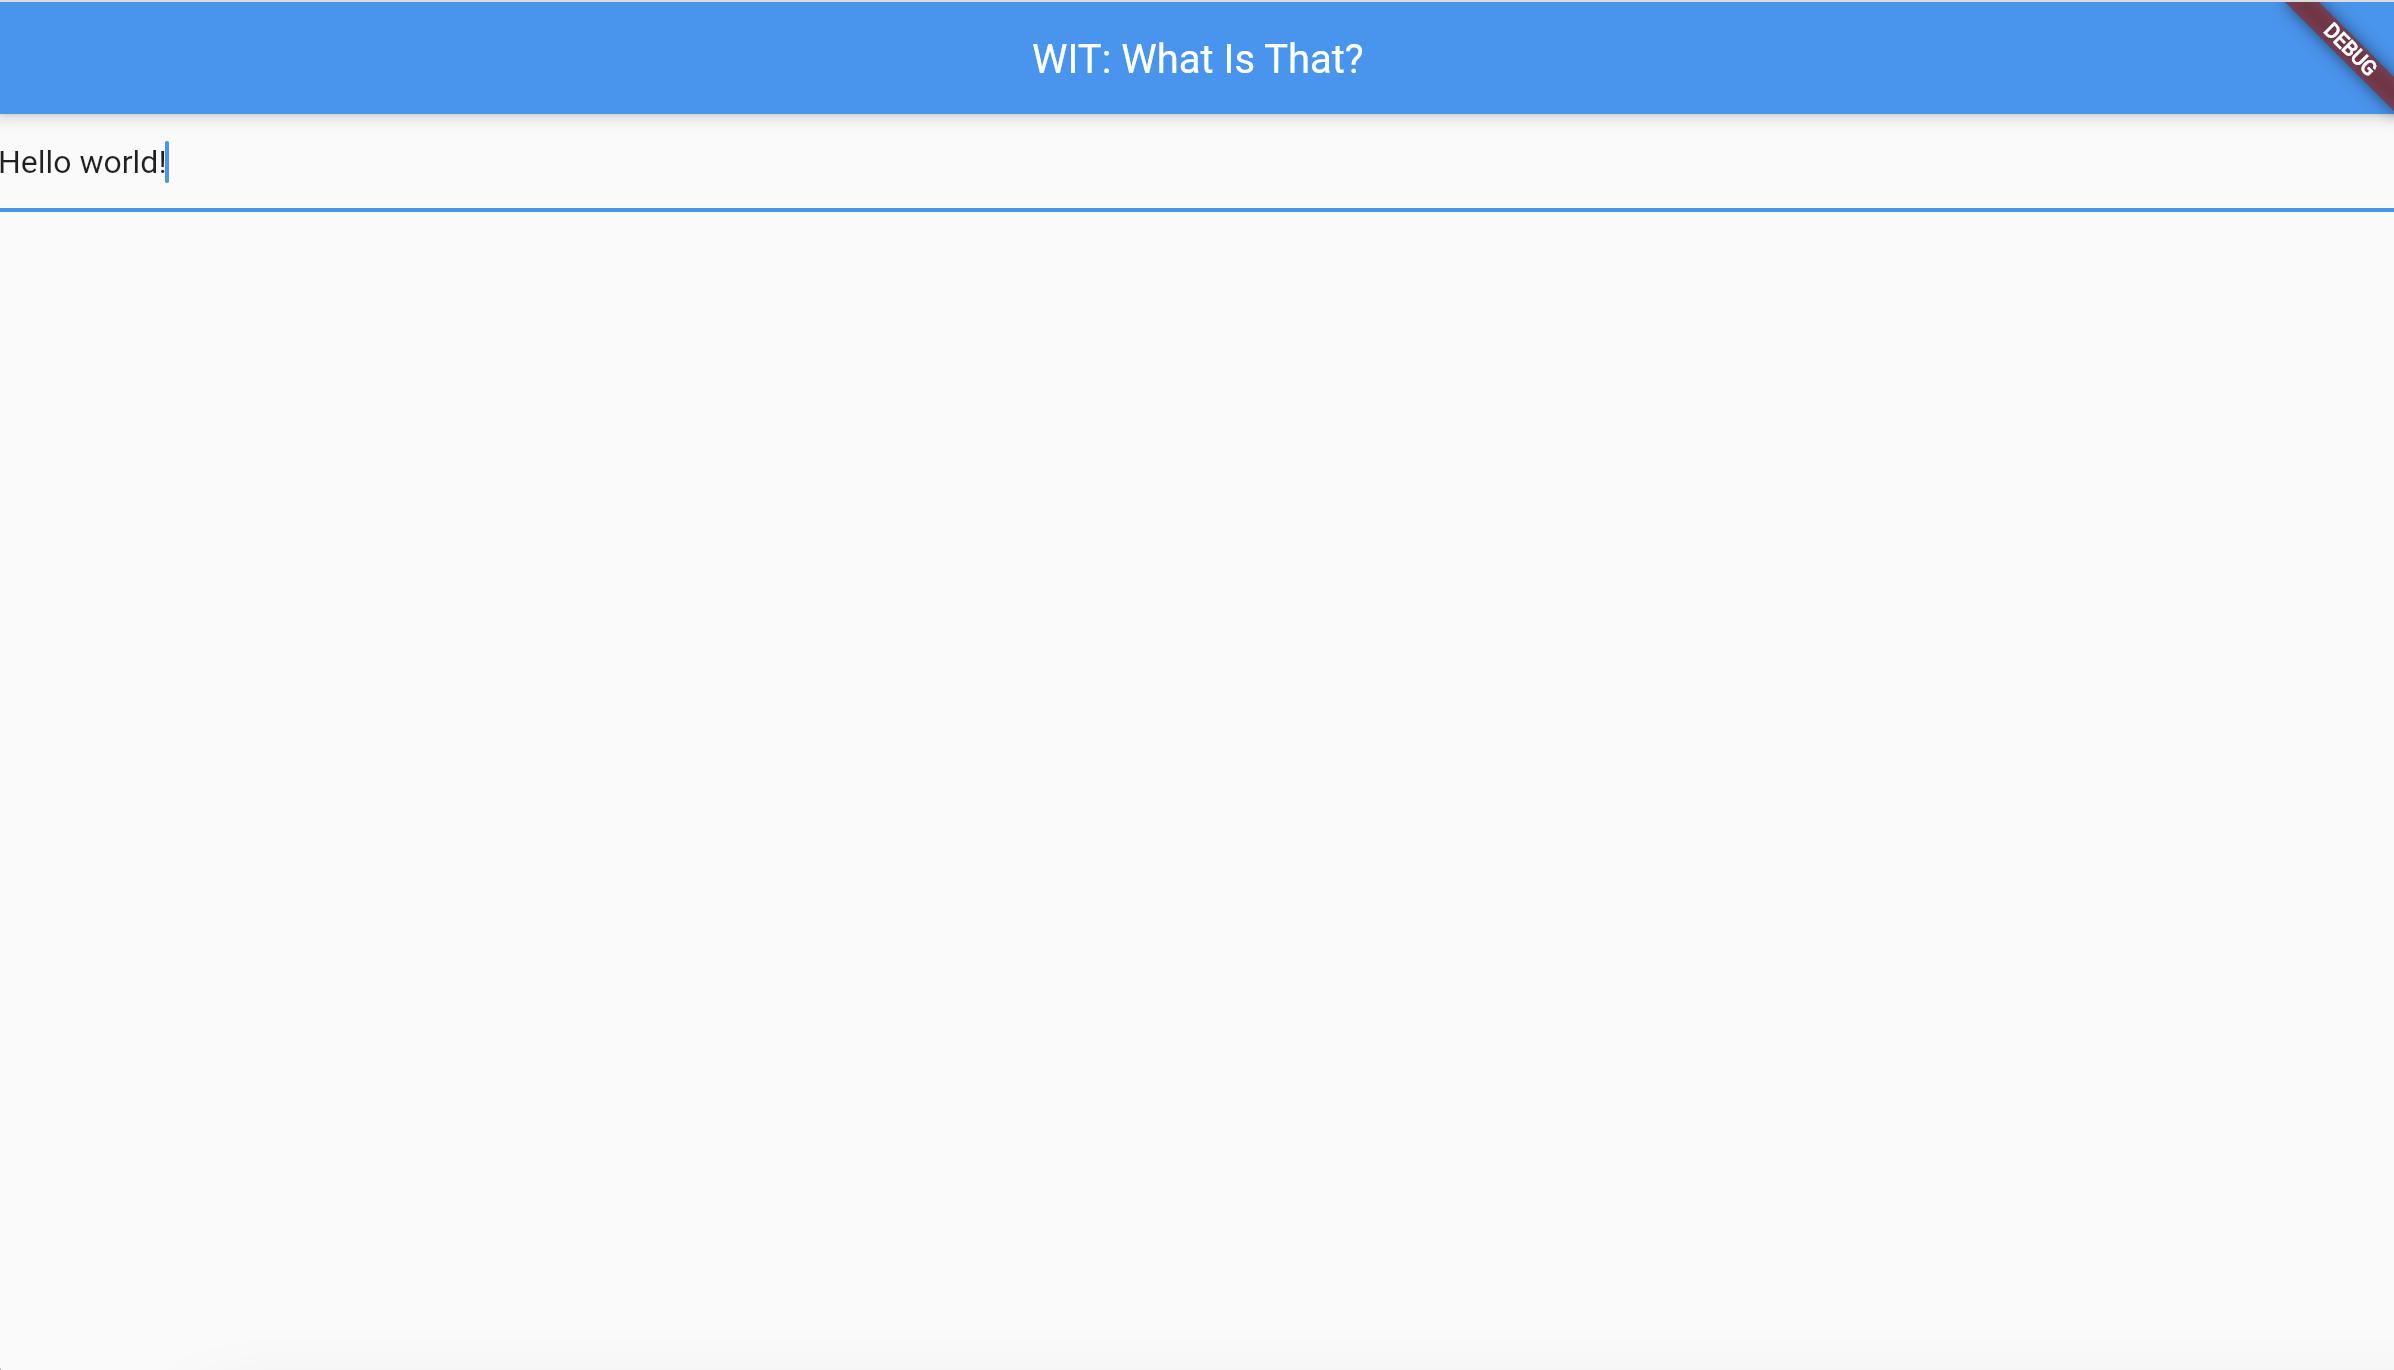
지금까지의 과정을 통해서 Appbar와
데이터를 입력할 수 있는
TextField 하나가 생성될 것이다.
이제 다음으로 해야 할 일은
작성한 질문을 ChatGPT에게 넘기고
그 답변을 받아와 페이지로 보여주는 작업이다.

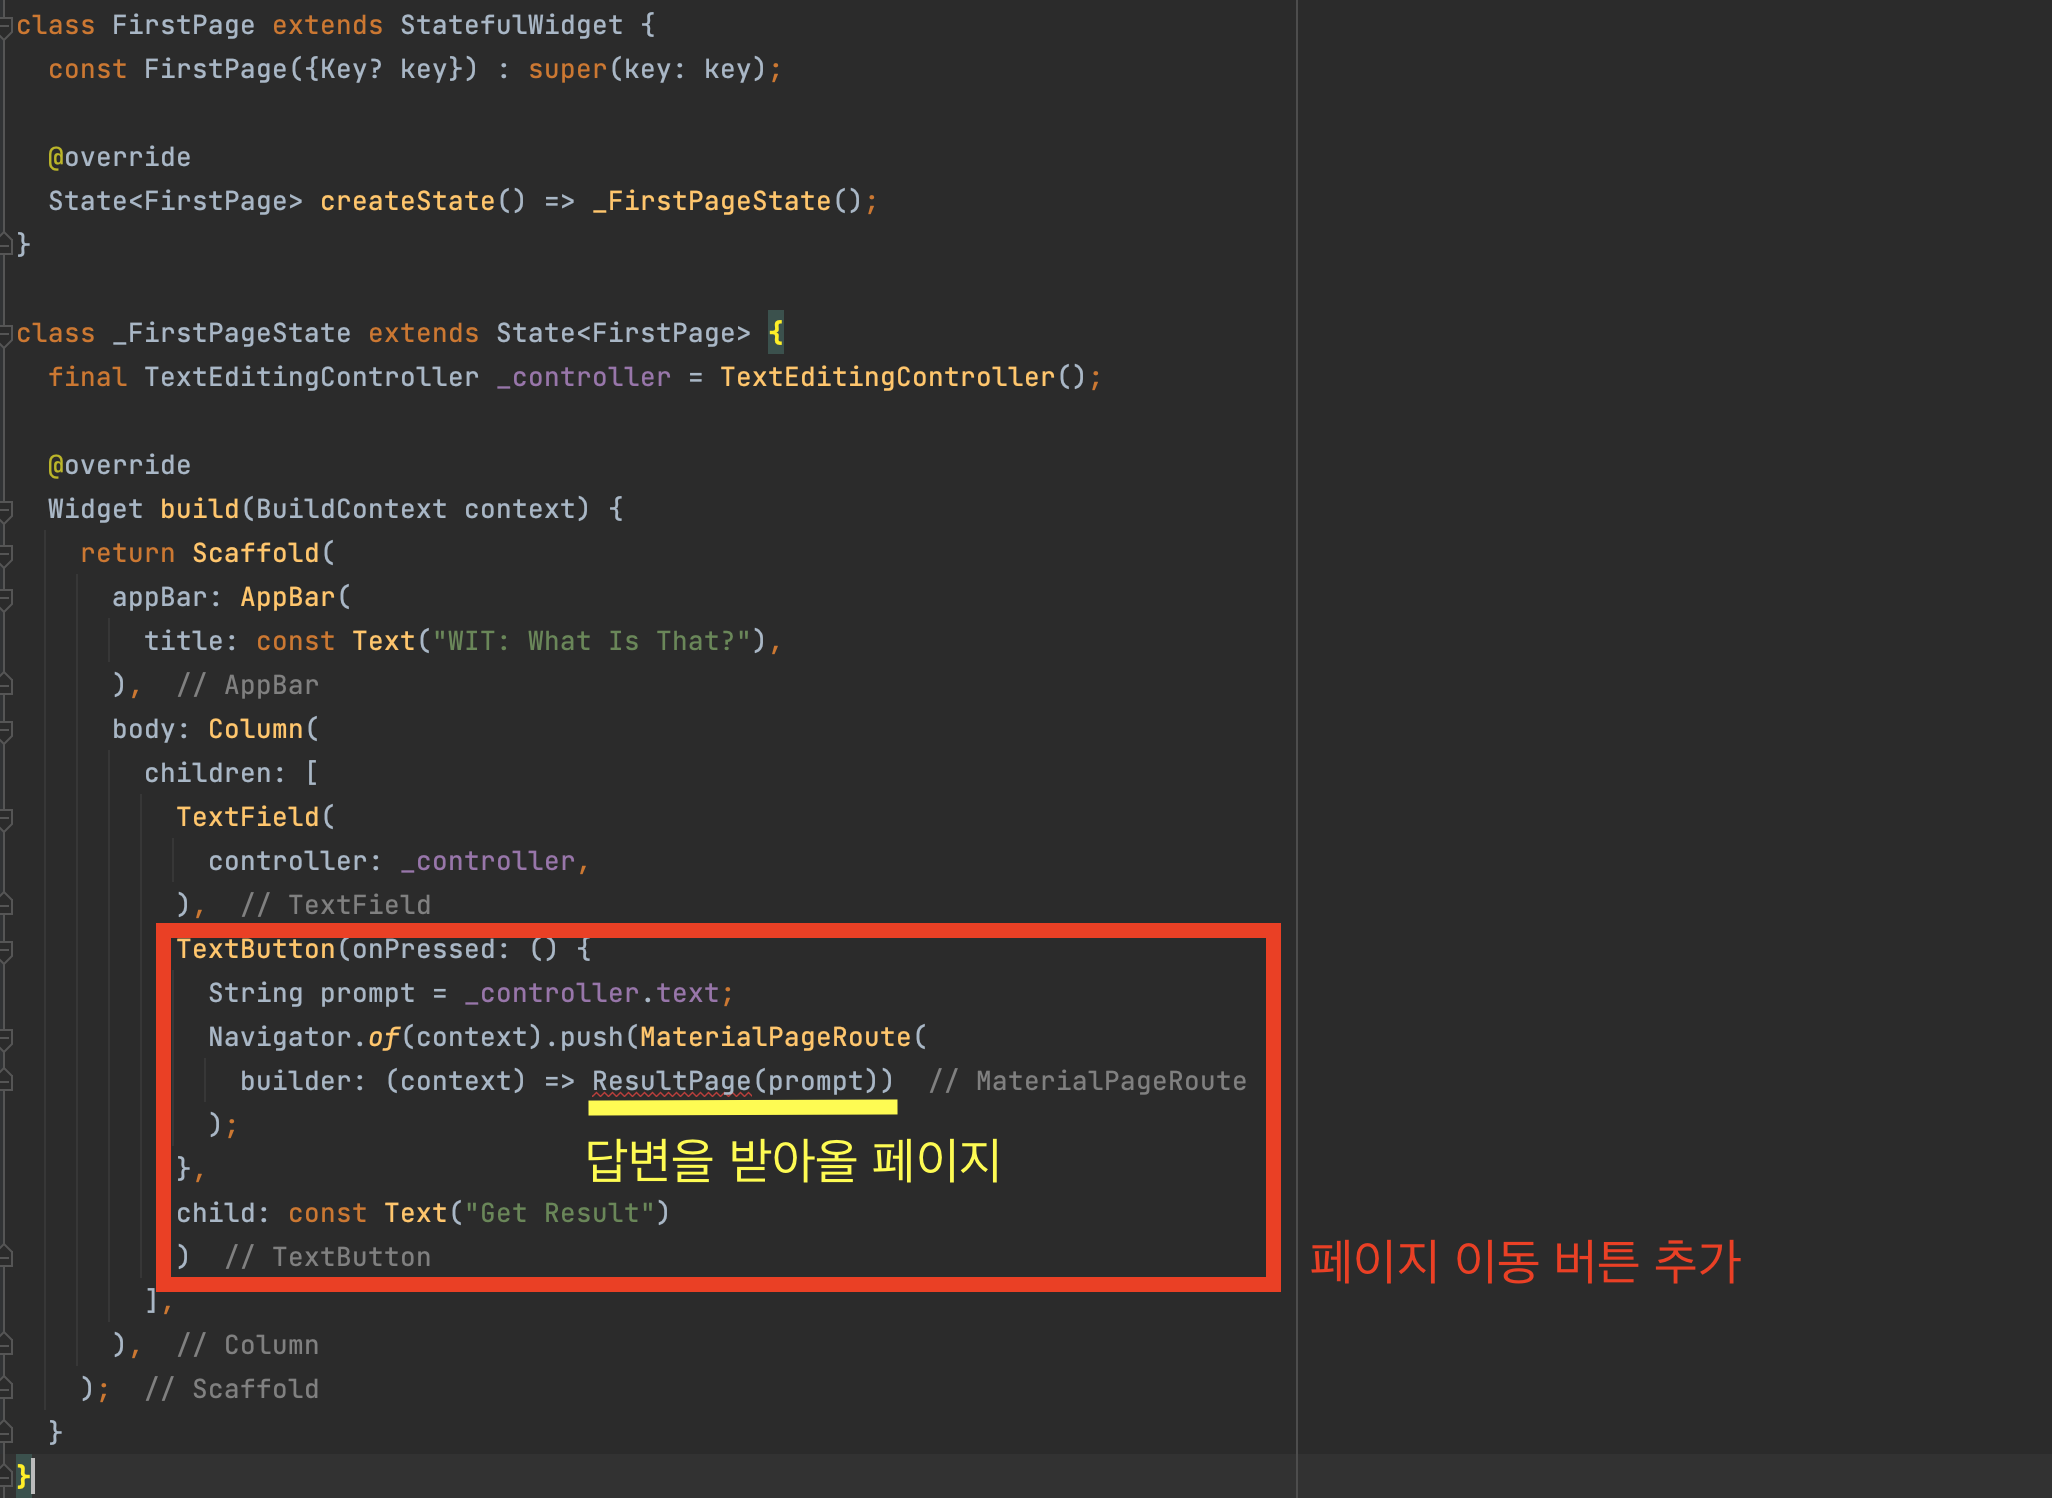
TextField로부터 받아온 데이터를
다른 페이지로 넘기는 작업이다.
ResultPage에게
"이따 GPT한테 _controller 속
텍스트 정보로 물어보면 돼~" 라고
전달하는 부분이다.
페이지 이동을 위해 Navigator를 사용했고,
정보를 전달하는 파라미터로
_controller.text를 사용했다는 점에 유의하자.
class FirstPage extends StatefulWidget {
  const FirstPage({Key? key}) : super(key: key);

  @override
  State<FirstPage> createState() => _FirstPageState();
}

class _FirstPageState extends State<FirstPage> {
  final TextEditingController _controller = TextEditingController();

  @override
  Widget build(BuildContext context) {
    return Scaffold(
      appBar: AppBar(
        title: const Text("WIT: What Is That?"),
      ),
      body: Column(
        children: [
          TextField(
            controller: _controller,
          ),
          TextButton(onPressed: () {
            String prompt = _controller.text;
            Navigator.of(context).push(MaterialPageRoute(
              builder: (context) => ResultPage(prompt))
            );
          },
          child: const Text("Get Result")
          )
        ],
      ),
    );
  }
}
여기까지 되었다면 위와 같이
버튼이 생긴 것을 확인할 수 있다.
아직까지는 버튼을 눌러도 아무런 변화가 없다.
이제 저 버튼을 눌렀을 때
사용자에게 입력 받은 질문을 바탕으로
GPT에게 답변을 받아와
결과를 출력하는 ResultPage를 만들어보자.
GPT 답변을 보여주는 페이지 만들기

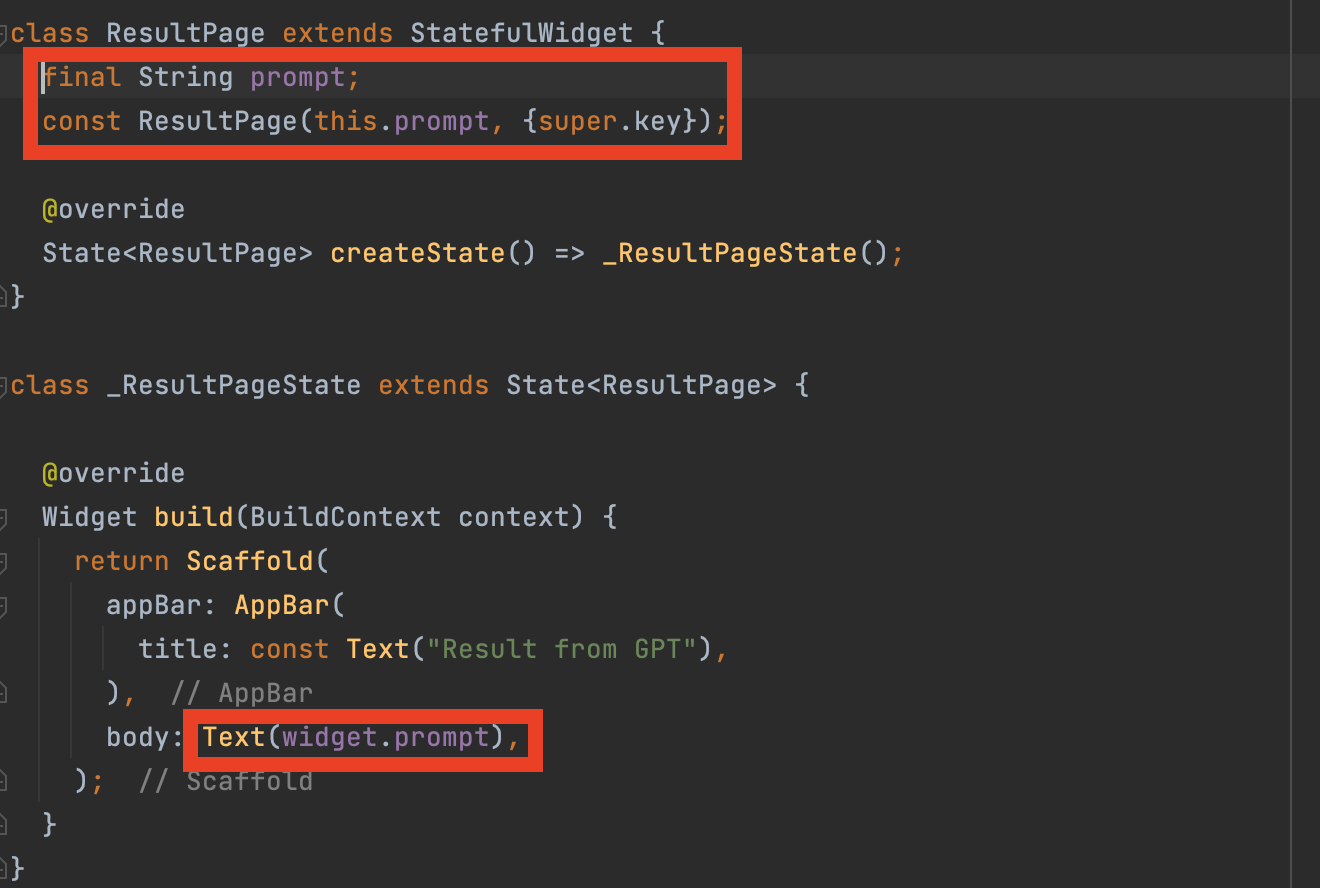
FirstPage에서 입력받은 내용을
ResultPage로 전달하는 과정이다.
이때 입력받은 내용은 String형이므로
ResultPage의 필수 String 자료형의
파라미터를 지정해준다.
그리고 prompt라는 데이터가 잘 전달되었는지
Text위젯에서 확인하기 위할 수 있도록 했다.
이때, _ResultPageState 클래스에서
ResultPage 클래스 내의 정보인
prompt에 접근하기 위해서는
'widget.prompt'를 이용해야 한다.
class ResultPage extends StatefulWidget {
  final String prompt;
  const ResultPage(this.prompt, {super.key});

  @override
  State<ResultPage> createState() => _ResultPageState();
}

class _ResultPageState extends State<ResultPage> {

  @override
  Widget build(BuildContext context) {
    return Scaffold(
      appBar: AppBar(
        title: const Text("Result from GPT"),
      ),
      body: Text(widget.prompt),
    );
  }
}
FirstPage 속 TextField를 통해 입력받은 정보가
ResultPage까지 잘 전달되는 모습을 볼 수 있다.
이제 전달받은 질문을 GPT에게 다시 전달하고,
답변을 받아와 페이지에 출력해보자.

먼저 테스트 차원에서 prompt 내용을
body에 띄워줬던 부분을
FutureBuilder로 변경한다.
이 위젯 안의 내용을 쉽게 설명하면
future의 내용이 완료되면 그 결과에 따라
builder 속 내용을 실행하라는 뜻이다.
future의 내용은 이전 게시물에서 만든
generateText이므로 설명은 생략하겠다.
그리고 builder쪽을 살펴 보면,
다음과 같은 세 가지 조건에 따라
각기 다른 위젯을 출력한다.
1. future쪽 작업을 기다리는 중에는...
CircularProgressIndicator 위젯으로 로딩 화면 위젯을 출력한다.
2. future쪽에서 에러가 발생하면...
그 에러 내용을 Text위젯에 담아 출력한다.
3. 그 외의 경우에는...
future쪽 작업이 잘 수행되었다고 보고 그 결과값을 Text위젯에 출력한다.
class ResultPage extends StatefulWidget {
  final String prompt;
  const ResultPage(this.prompt, {super.key});

  @override
  State<ResultPage> createState() => _ResultPageState();
}

class _ResultPageState extends State<ResultPage> {
  @override
  Widget build(BuildContext context) {
    return Scaffold(
      appBar: AppBar(
        title: const Text("Result from GPT"),
      ),
      // body: Text(widget.prompt),
      body: FutureBuilder<String>(
        future: generateText(widget.prompt),
        builder: (context, snapshot) {
          if (snapshot.connectionState == ConnectionState.waiting) {
            return const Center(child: CircularProgressIndicator());
          } else if (snapshot.hasError) {
            return Text('Error: ${snapshot.error}');
          } else {
            return Text('${snapshot.data}');
          }
        },
      ),
    );
  }
}
서비스 의도에 맞게 개발하기
여기까지 사용자로부터 입력받은 질문에 대한
GPT의 답변을 보여주는 페이지를 구현한 것이다.
0 - 개발 의도
그동안 ChatGPT라는 인공지능을 이용하여 접하기 어려운, 이해하기 힘든, 고급의 정보를 얻으려고만 했던 것 같다. 그러던 어느날 ChatGPT를 사용해보던 중, "8살에게 설명하듯이 알려줘" 라는 명령
jschan0911.tistory.com
나는 여기서 더 나아가 WIT 서비스의 목적에 맞게
GPT로부터 입력한 단어에 대해
8살 아이에게 설명하는듯한 답변을 받아낼 것이다.
이 부분은 GPT에게 질문을 전달하기 전에만
prompt 내용을 알맞게 수정하면 된다.
나는 generateText 부분을 수정하도록 하겠다.

이렇게 되면 FirstPage에서 단어만 입력하더라도,
그 단어에 대해 8살 아이에게 설명하는 수준으로
GPT가 답변을 해줄 것이다.
예를 들어 elephant만 입력하더라도, GPT에게는
"What is elephant? Tell me like you're
explaining to an eight-year-old"로
질문하게 된다.
Future<String> generateText(String prompt) async {
  final response = await http.post(
    Uri.parse(apiUrl),
    headers: {'Content-Type': 'application/json','Authorization': 'Bearer $apiKey'},
    body: jsonEncode({
      "model": "text-davinci-003",
      'prompt': "What is $prompt? Tell me like you're explaining to an eight-year-old.",
      'max_tokens': 1000,
      'temperature': 0,
      'top_p': 1,
      'frequency_penalty': 0,
      'presence_penalty': 0
    }),
  );

  Map<String, dynamic> newresponse = jsonDecode(utf8.decode(response.bodyBytes));

  return newresponse['choices'][0]['text'];
}
현재까지 완성된 코드
import 'dart:convert';
import 'package:flutter/material.dart';
import 'package:http/http.dart' as http;

const apiKey = '발급받은 API key';
const apiUrl = 'https://api.openai.com/v1/completions';

void main() {
  runApp(const MyApp());
}

class MyApp extends StatelessWidget {
  const MyApp({Key? key}) : super(key: key);

  @override
  Widget build(BuildContext context) {
    return const MaterialApp(
      home: FirstPage(),
    );
  }
}

class FirstPage extends StatefulWidget {
  const FirstPage({Key? key}) : super(key: key);

  @override
  State<FirstPage> createState() => _FirstPageState();
}

class _FirstPageState extends State<FirstPage> {
  final TextEditingController _controller = TextEditingController();

  @override
  Widget build(BuildContext context) {
    return Scaffold(
      appBar: AppBar(
        title: const Text("WIT: What Is That?"),
      ),
      body: Column(
        children: [
          TextField(
            controller: _controller,
          ),
          TextButton(onPressed: () {
            String prompt = _controller.text;
            Navigator.of(context).push(MaterialPageRoute(
                builder: (context) => ResultPage(prompt))
            );
          },
              child: const Text("Get Result")
          )
        ],
      ),
    );
  }
}

class ResultPage extends StatefulWidget {
  final String prompt;
  const ResultPage(this.prompt, {super.key});

  @override
  State<ResultPage> createState() => _ResultPageState();
}

class _ResultPageState extends State<ResultPage> {
  @override
  Widget build(BuildContext context) {
    return Scaffold(
      appBar: AppBar(
        title: const Text("Result from GPT"),
      ),
      // body: Text(widget.prompt),
      body: FutureBuilder<String>(
        future: generateText(widget.prompt),
        builder: (context, snapshot) {
          if (snapshot.connectionState == ConnectionState.waiting) {
            return const Center(child: CircularProgressIndicator());
          } else if (snapshot.hasError) {
            return Text('Error: ${snapshot.error}');
          } else {
            return Text('${snapshot.data}');
          }
        },
      ),
    );
  }
}

Future<String> generateText(String prompt) async {
  final response = await http.post(
    Uri.parse(apiUrl),
    headers: {'Content-Type': 'application/json','Authorization': 'Bearer $apiKey'},
    body: jsonEncode({
      "model": "text-davinci-003",
      'prompt': "What is $prompt? Tell me like you're explaining to an eight-year-old.",
      'max_tokens': 1000,
      'temperature': 0,
      'top_p': 1,
      'frequency_penalty': 0,
      'presence_penalty': 0
    }),
  );

  Map<String, dynamic> newresponse = jsonDecode(utf8.decode(response.bodyBytes));

  return newresponse['choices'][0]['text'];
}
다음에는 사용자의 이해를 돕기 위해
입력 받은 단어와 관련된 이미지를 검색하여
함께 띄워주는 작업을 해보겠다.
4 - Pixabay API를 이용하여 Flutter에서 이미지 사용하기(코드 포함)
3 - API를 이용하여 Flutter에서 ChatGPT 구현하기(코드 포함) 2 - Flutter에서 ChatGPT API 사용하기 (2편) 1 - Flutter에서 ChatGPT API 사용하기 (1편) 이번 프로젝트를 하기 위해서는 ChatGPT의 API를 사용해야 한다.
jschan0911.tistory.com
'프로젝트 > WIT: What is That? - 쉬운 사전' 카테고리의 다른 글
| 5 - Flutter에서 TextField 꾸미기 (밑줄, 커서 없애기) (0) | 2023.05.16 |
|---|---|
| 4 - Pixabay API를 이용하여 Flutter에서 이미지 사용하기(코드 포함) (0) | 2023.03.03 |
| 2 - Flutter에서 ChatGPT API 사용하기 (2편) (3) | 2023.02.28 |
| 1 - Flutter에서 ChatGPT API 사용하기 (1편) (0) | 2023.02.28 |
| 0 - 개발 의도 (0) | 2023.02.27 |